A snowman is a jolly decoration to have during the holidays. But even if the sun is shining and the temperature is 80 degrees outside, you can still have a snowman in the front yard, thanks to a handy tomato cage serving as its foundation. Or is it the magic of his old top hat that makes him alive as he can be?
 How to Make a Snowman Out of a Tomato Cage Image Credit: Jonathan Fong
Video of the Day
Tomato Cage Snowman Tutorial
Things You\’ll Need
-
54-inch tomato cage
-
12-inch round paper lantern
-
Tissue paper
-
Duct tape
-
King size white sheet
-
White ribbon
-
Black felt
-
Scissors
-
Orange felt
-
Black buttons
-
Green felt
-
Branches
-
String
-
Scarf
-
Top hat

Step 1: Attach the Head to the Body
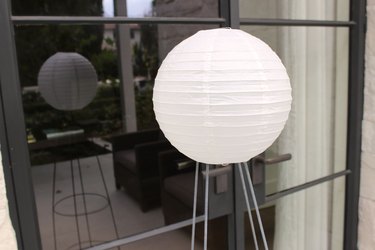
The foundation of the snowman\’s body is a 54-inch tomato cage. Tomato cages are tall, cone-shaped wire structures sold at nurseries. For the head, we\’ll use a 12-inch round paper lantern, which you can find at a party supply store. Position the tomato cage so the loose spokes are on top, and the large round wire circle is at the bottom. (It will look like a Christmas tree.) Attach the head to the body, sliding the spokes of the tomato cage into the bottom opening in the paper lantern.
Tip
While 54-inch tomato cages make a \”life-sized\” snowman, they\’re available in smaller sizes as well. Select a shorter cage for a smaller snowman, or use multiple sizes for a snowman family.
Step 2: Fatten the Snowman
To build the snowman\’s rotund shape, ball up tissue paper and attach the lumps around the tomato cage with duct tape. You can also use newspaper or butcher paper.

Create one plumped up section for the torso, and then another one for the lower half of the body that is slightly thicker.

Step 3: Cover With a Sheet
Cover the entire snowman foundation with a white, king-sized sheet. It will look like a ghost, but don\’t worry. When we\’re through he will be a bonafide snowman.

Step 4: Cinch the Neck and Waist
To delineate the neck and waist of the snowman, tie a white ribbon at the point where the paper lantern meets the top of the tomato cage and where the two body portions meet. Tuck any excess fabric underneath the tomato cage. See, it\’s already looking more like a snowman.

Step 5: Add the Facial Features
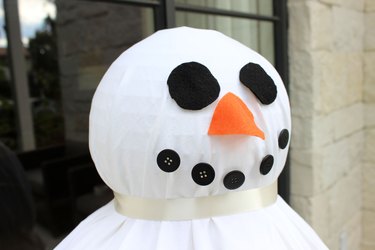
Cut out two 3-inch circles of black felt with scissors and glue them to the head for the eyes.

Cut out a four-inch square out of orange felt, fold it in half diagonally, and glue two opposite corners to the head for the nose.

Glue black buttons to the head to create a smile.
Step 6: Decorate the Body
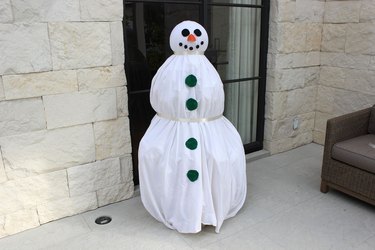
Add large \”buttons\” to the body by cutting out 4-inch circles of felt and gluing them to both round body portions. I used green felt, but dress your snowman with whatever colors you\’d like.
Step 7: Add Arms
Tie two branches to the ribbon around the neck to act as the arms. Choose a skinny branch with a lot of twigs at the end of it so the twigs are like fingers.

Step 8: Wrap a Scarf Around It
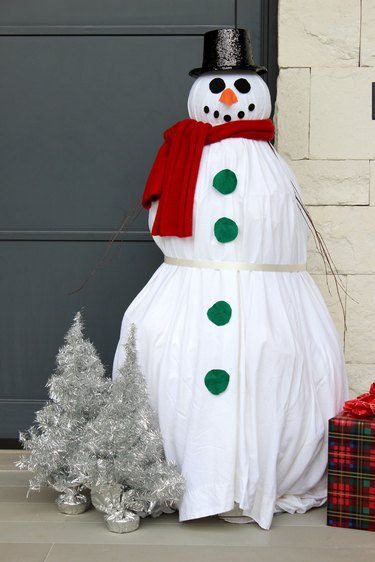
Tie a scarf around the neck to hide where you tied the branches to the ribbon. The scarf also adds a nice sartorial touch to our snowman.

Step 9: Finish with a Hat
The snowman isn\’t finished without its magical hat. A plastic top hat, which you can find at a party supply store, completes the look and makes this snowman a true gentleman, ready to greet all your holiday visitors in style.

Tip
If your shed is filled with tomato cages, you can also use them to make DIY Christmas trees or angels. Use your imagination, or at least your online search skills!
