Things You\’ll Need
-
Bleach
-
Water
-
Gloves
-
Tongs
-
Bottle brush trees
-
Dye
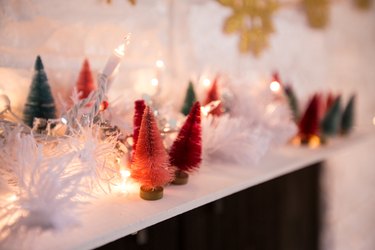
 Custom dye you own bottle brush trees. Image Credit: Susie Delaney
Bleaching and dying your own bottle brush trees makes a wonderful and fully customizable addition to your holiday decor. Why not spice up your traditional Christmas decor by adding pops of color?
Video of the Day
Step 1
 Make sure to wear gloves when using bleach. Image Credit: Susie Delaney
In a well ventilated area, pour 1 cup of bleach to 2 cups of water in a large container or bowl. Make sure to wear gloves for this step. Use tongs or chopsticks to submerge the bottle brush tree into the bleach solution.
Step 2
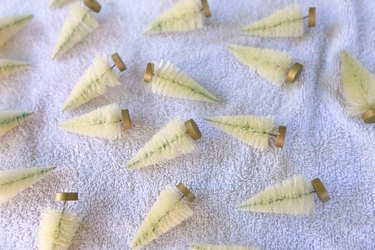
 Leave the trees in the bleach solution until the green color disappears. Image Credit: Susie Delaney
Depending on the strength of the solution, leave the bottle brush trees in the bleach solution until they become white. If left in too long the bleach will eat away at the bristles.
Step 3
 Thoroughly rinse the trees. Image Credit: Susie Delaney
When all the color is gone, transfer the trees to a bucket or sink full of water to give them a good rinse. Lay the trees out on a towel to let dry while the dye is prepared for the next step.
Step 4
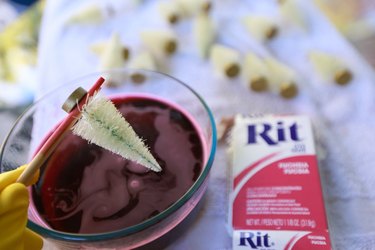
 Dip the bleached bottle brush tree into the dye. Image Credit: Susie Delaney
Not much dye is needed for such a small item. If using Rit fabric dye, use 1 tablespoon mixed with a bit of warm water. Experiment with using more or less dye concentrate to achieve the desired effect. A quick dip into the dye will yield a lighter color. Leave the tree in the dye for a few minutes to get a bold and saturated color.
Step 5
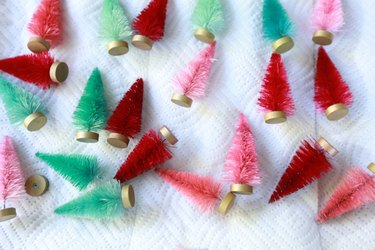
 Rinse and dry the dyed trees. Image Credit: Susie Delaney
When dyeing is complete, transfer to a sink or bucket full of water to thoroughly rinse the excess dye. Repeat this process until the water is clear. Lay trees out on a towel to dry. If left wet or in the water too long, the metal center will rust.
Warning
Use gloves when using bleach and the dye to protect hands. This project should be done in a well ventilated area.
